Lighting is one of the most important factors of producing cinematic photography. No matter what facet of photography you specialize in, lighting plays a vital role in determining the mood of an image. As a solo photographer who works on location, a majority of my photography utilizes only natural light. While you can always adjust and manipulate exposure in post, your images will look a lot more authentic without intense color grading and without applying a variety of different masks in editing.
In this blog, I’m going to share some of my methods when using natural light on location and how I plan photoshoots depending on the mood I’m going for.
CAPTURING PHOTOS IN GOLDEN HOUR
You’ll find that many of the images in my travel photography portfolio and in my lifestyle photography portfolio are mostly taken during golden hour (and more specifically sunset). The warm colors that appear during sunset create beautiful and dramatic images. One of my favorite ways to create cinematic images in street photography during sunrise or sunset is to find a subject in the frame and use them as a silhouette under the golden sky.
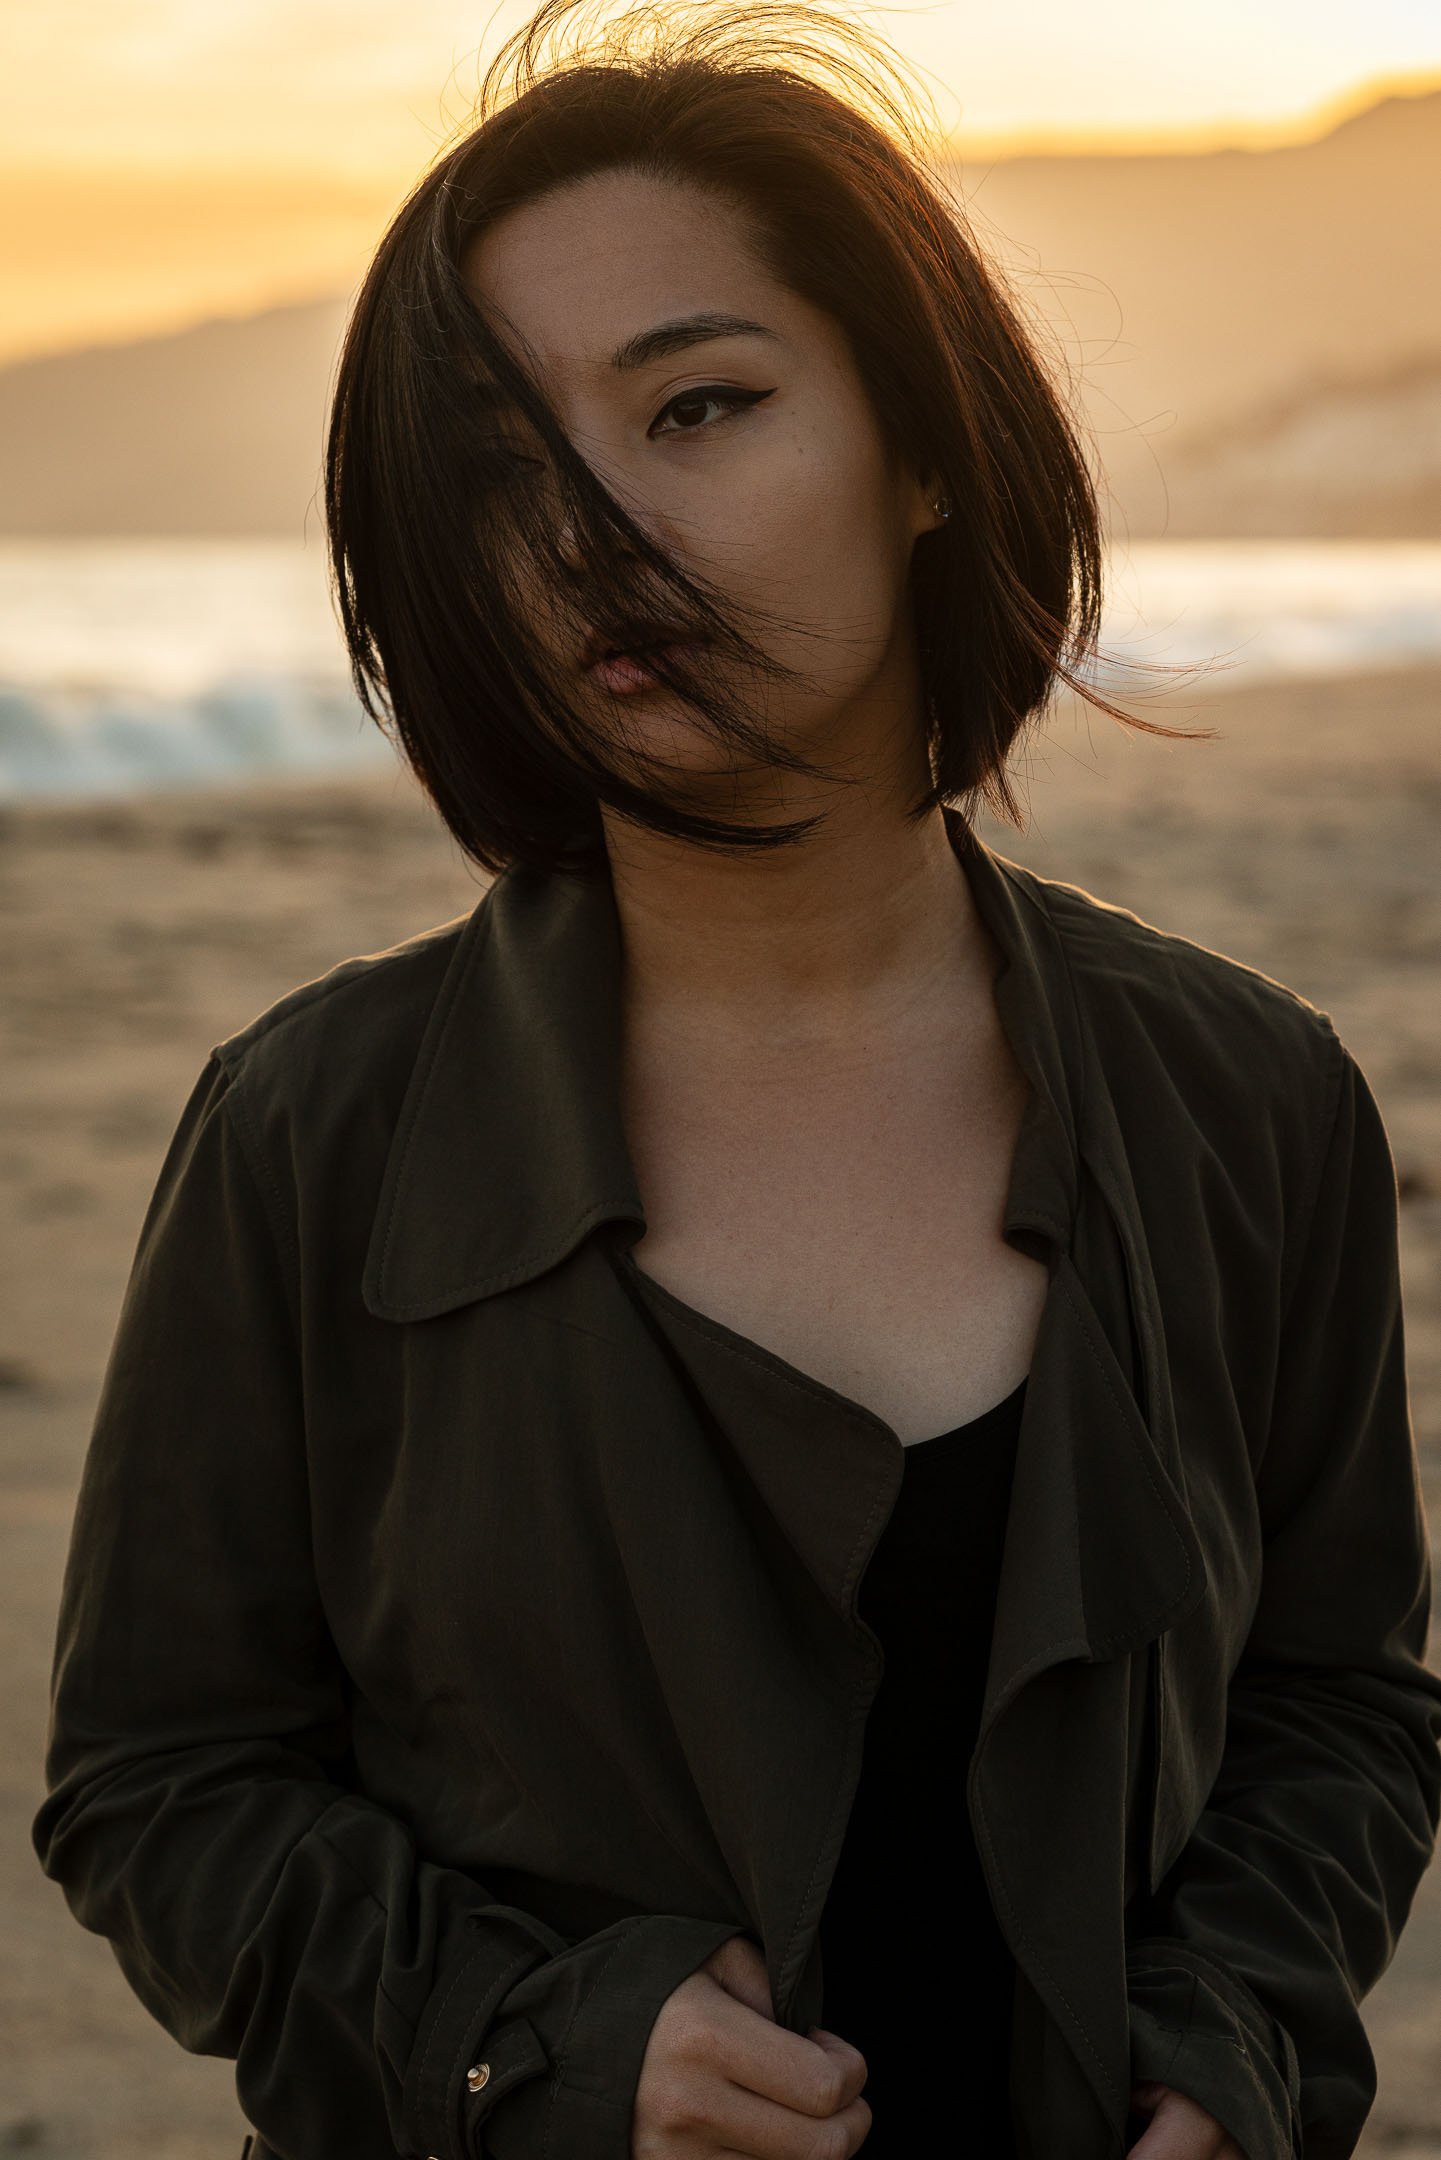
Oppositely, golden hour is a great opportunity to produce cinematic portraits by highlighting a model’s face in the most appealing way. The benefits of capturing portraits during this time versus the middle of the day is that you get the beautiful warm colors on the model’s skin without having to worry about unflattering shadows under the eyes and nose. I personally like experimenting with the sun facing the model, as well as photographing backlit.
TAKING PHOTOS DURING BLUE HOUR
Before sunrise or after sunset is a great opportunity to produce some beautiful blue hour images. Because the sun is no longer in the sky, the lighting becomes a lot more even and creates a softer image. If you’re looking to take photos with some more even lighting but not be restricted to the shade like you might be during the day, then blue hour is a great time to do some photography.
When I first started photography, I only did street photography at night, and sometimes would try to capture images at sunset. I didn’t think much about blue hour, but I began to see how beautiful the images could turn out during this time of day during one of my portrait sessions.
Although golden hour is my favorite time to shoot cinematic portraits, blue hour photography provides another style of photography that can also capture beautiful, cinematic photos.
EDITING THE FINAL IMAGES
As a video editor who has worked on documentary-style videos and short films, the editing process is just as important as the actual production of the photoshoot. Photo editing plays a huge role in finalizing the mood of a photoshoot.
I generally prefer to handle the editing of the photos I take myself. But if working with another editor, it’s important that the entire team is on the same page and delivers a consistent tone.
My choice of editing software is Adobe Lightroom Classic, as it allows me to have a lot of creative control over the final raw photo. If necessary, I’ll transfer the image into Adobe Photoshop for retouching and final touch-ups if necessary. The wide variety of features that both of these programs offer has been very useful in developing a consistent style among brand shoots.
OVERCAST WEATHER
An overcast day creates nice, even lighting for portraits. But in general it doesn't provide the opportunity to capture the most cinematic shots. During these situations, it’s good to try and remove as much of the sky in your image as possible. A partially cloudy sky can make an image look dramatic, while a fully overcast sky will look plain and doesn’t add anything interesting to the photograph.
If you’re doing street photography, then I would recommend capturing images at a lower angle and exaggerating the height of the buildings around you so that they take up more of the frame than they would when shooting at eye level. Another tactic to avoid a clear sky is using a storefront as your background. I also use this tactic a lot during nighttime photography as the lights from stores will usually be enough to illuminate part of your image.
When shooting portraits in nature, you can hide your subject behind trees or rocks on the beach so that there is some sort of texture being utilized.
CHALLENGES OF RELYING ON NATURAL LIGHT
I’ve spoken about this before, but it’s worth reiterating that one of the biggest challenges you’ll face when relying on natural light is that you don’t have control over how harsh the light will be or for how long you’ll have it when shooting on location.
When I first travel to another city or country, I like to explore a part of the city and take photos just as a way to document my first experience. But if I come back, I’ll usually remember which parts of the city I would love to catch during sunset or even in the middle of the day when there might be more people passing by to make the photo more dynamic.
The photos below were taken during my first visit to Alexanderplatz, Berlin. During my 3-Day stay in the city, I visited Alexanderplatz almost everyday at different times of the day so I could catch a view of the plaza early in the morning when it wasn’t busy, and a beautiful sunset over the river.
Location scouting is an essential part of creating dynamic images in lifestyle photography when other models are involved because you’ll have more time to engage in creative direction if you have an idea as to what the lighting will look like in a certain location ahead of time.
In the photos below, I worked with actress Rhea Morales to produce a lifestyle photoshoot in Downtown Los Angeles featuring Bose headphones. Even though it was a pretty spotaneous shoot with not too much planning and only an hour of shooting, we were able to capture amazing images in the location and get some amazing natural light portraits during golden hour.
I have gone to Downtown Los Angeles plenty of times for both street photography and portrait photography. When we decided on the location, I already had a good idea of how the lighting was going to look and so I had more time to focus on directing Rhea to get some great photos.
I hope this post was helpful in either helping you think about how natural lighting can affect your photography and hopefully encourage you to go out and experiment with new compositions on-location.
There are plenty of ways to achieve cinematic photos without having to spend a lot of money on lighting equipment. In fact, I would say mastering natural light is an incredible way to develop your skills as a photographer.
Let me know if you have any questions or feedback. But until then, thanks for reading!